Handling webhooks using Django and ngrok
In this article we’ll go over how to handle webhooks using Django, create a webhook in GitHub, and test the webhook on your local machine using ngrok. But first a brief primer on webhooks.
If you’re already familiar with webhooks then feel free to skip past this first part.
What are webhooks? #
Imagine you are writing an app that needs to be informed when an event occurs in another system. The event could be when a user sends a tweet or when the price of an item changes.
One way to know when the event occurs is to check every so often. For instance, your app could make a request to Twitter every 5 minutes asking “Has user posted anything yet?” This is called polling, and it can be taxing on your servers because you must constantly make requests to external services.
Another way to know an event has occurred is to have the other service inform your app when things change. This can be accomplished using webhooks. With webhooks you no longer need to poll every 5 minutes or once a day. Instead, your app receives events in real-time.
Handling GitHub webhooks #
GitHub has a plethora of events that can trigger webhooks. The event we’ll handle is the default push event, which occurs when a user pushes commits, branches, or tags to a GitHub repository.
Let’s write some code that handles GitHub’s webhooks. We’re writing a Django app, so we’ll create a view function. Be sure to wire up this view to the URL /hooks/handle_github.
Below is a view function that will handle GitHub webhooks based on the instructions in GitHub’s documentation. For this to work, you’ll need to first add a GITHUB_WEBHOOK_SECRET to your settings file. Think of this as your webhook’s password, so make it a long string with lots of random characters. Also, remember it, because we’ll need it later.
import hashlib
import hmac
import httplib
import json

from django.conf import settings
from django.http import HttpResponse, HttpResponseForbidden
from django.views.decorators.csrf import csrf_exempt


def handle_webhook(event, payload):
    """Simple webhook handler that prints the event and payload to the console"""
    print('Received the {} event'.format(event))
    print(json.dumps(payload, indent=4))


@csrf_exempt
def handle_github_hook(request):
    # Check the X-Hub-Signature header to make sure this is a valid request.
    github_signature = request.META['HTTP_X_HUB_SIGNATURE']
    signature = hmac.new(settings.GITHUB_WEBHOOK_SECRET, request.body, hashlib.sha1)
    expected_signature = 'sha1=' + signature.hexdigest()
    if not hmac.compare_digest(github_signature, expected_signature):
        return HttpResponseForbidden('Invalid signature header')

    # Sometimes the payload comes in as the request body, sometimes it comes in
    # as a POST parameter. This will handle either case.
    if 'payload' in request.POST:
        payload = json.loads(request.POST['payload'])
    else:
        payload = json.loads(request.body)

    event = request.META['HTTP_X_GITHUB_EVENT']

    # This is where you'll do something with the webhook
    handle_webhook(event, payload)

    return HttpResponse('Webhook received', status=httplib.ACCEPTED)
Requests from GitHub come into our app through the handle_github_hook view function. The view ensures the request is authorized, loads the payload JSON, does something useful with the payload, and returns an HTTP response.
When writing your handler, keep in mind that GitHub expects you to respond to webhooks within 30 seconds. If the task you need to perform can happen quickly then do it synchronously. Otherwise it’s probably best to put the task in the background using Celery or RQ.
Now that we have code that handles webhooks, we need to test it.
Enter ngrok #
Webhooks take some work to test locally. That’s because by their very nature they expect a publicly accessible URL to send requests to, and most of our development laptops don’t have that. Luckily there is a very easy way that we can create a public URL that leads right to our development server: ngrok.
Ngrok is a command line application you can use to expose your development machine to the Internet. To install ngrok, go to ngrok.io and follow their installation steps. It’s as simple as downloading and unzipping. I’ll wait while you go off and do that.
🎵 Jeopardy theme song 🎵
Is ngrok installed now? Great! To run it, open up your terminal and enter the following.
ngrok http 8000
This should start up a secure tunnel that is connected to your local HTTP port. It will look something like this:
ngrok by [@inconshreveable](http://twitter.com/inconshreveable)                                                                                                                                         (Ctrl+C to quit)

Session Status                online
Version                       2.1.18
Region                        United States (us)
Web Interface                 [http://127.0.0.1:4041](http://127.0.0.1:4041)
Forwarding                    [http://dda5f8fd.ngrok.io](http://dda5f8fd.ngrok.io) -> localhost:8000
Forwarding                    [https://dda5f8fd.ngrok.io](https://dda5f8fd.ngrok.io) -> localhost:8000

Connections                   ttl     opn     rt1     rt5     p50     p90
                              0       0       0.00    0.00    0.00    0.00
The forwarding URL http://dda5f8fd.ngrok.io is what I’ll use for the webhook. Your URL will be different, so use whatever ngrok provides.
Setting up our webhook #
Now that we have code to handle webhooks and a publicly accessible URL, let’s set up a webhook in GitHub.
You can add a webhook to a repository programmatically using GitHub’s API. In fact, that’s what you should do to automate this whole process. In the spirit of brevity, however, we’ll add a webhook through the GitHub UI. To do that, go to one of your repositories in GitHub, select Settings, then Webhooks.
Add your ngrok URL + /hooks/handle_github to the Payload URL field. Next, add the secret string from your Django settings to the Secret field. GitHub will send along this secret string so that you can verify the request is really coming from them. Finally, choose the events you would like GitHub to notify your app about. When it’s all said and done, the form should look something like this:
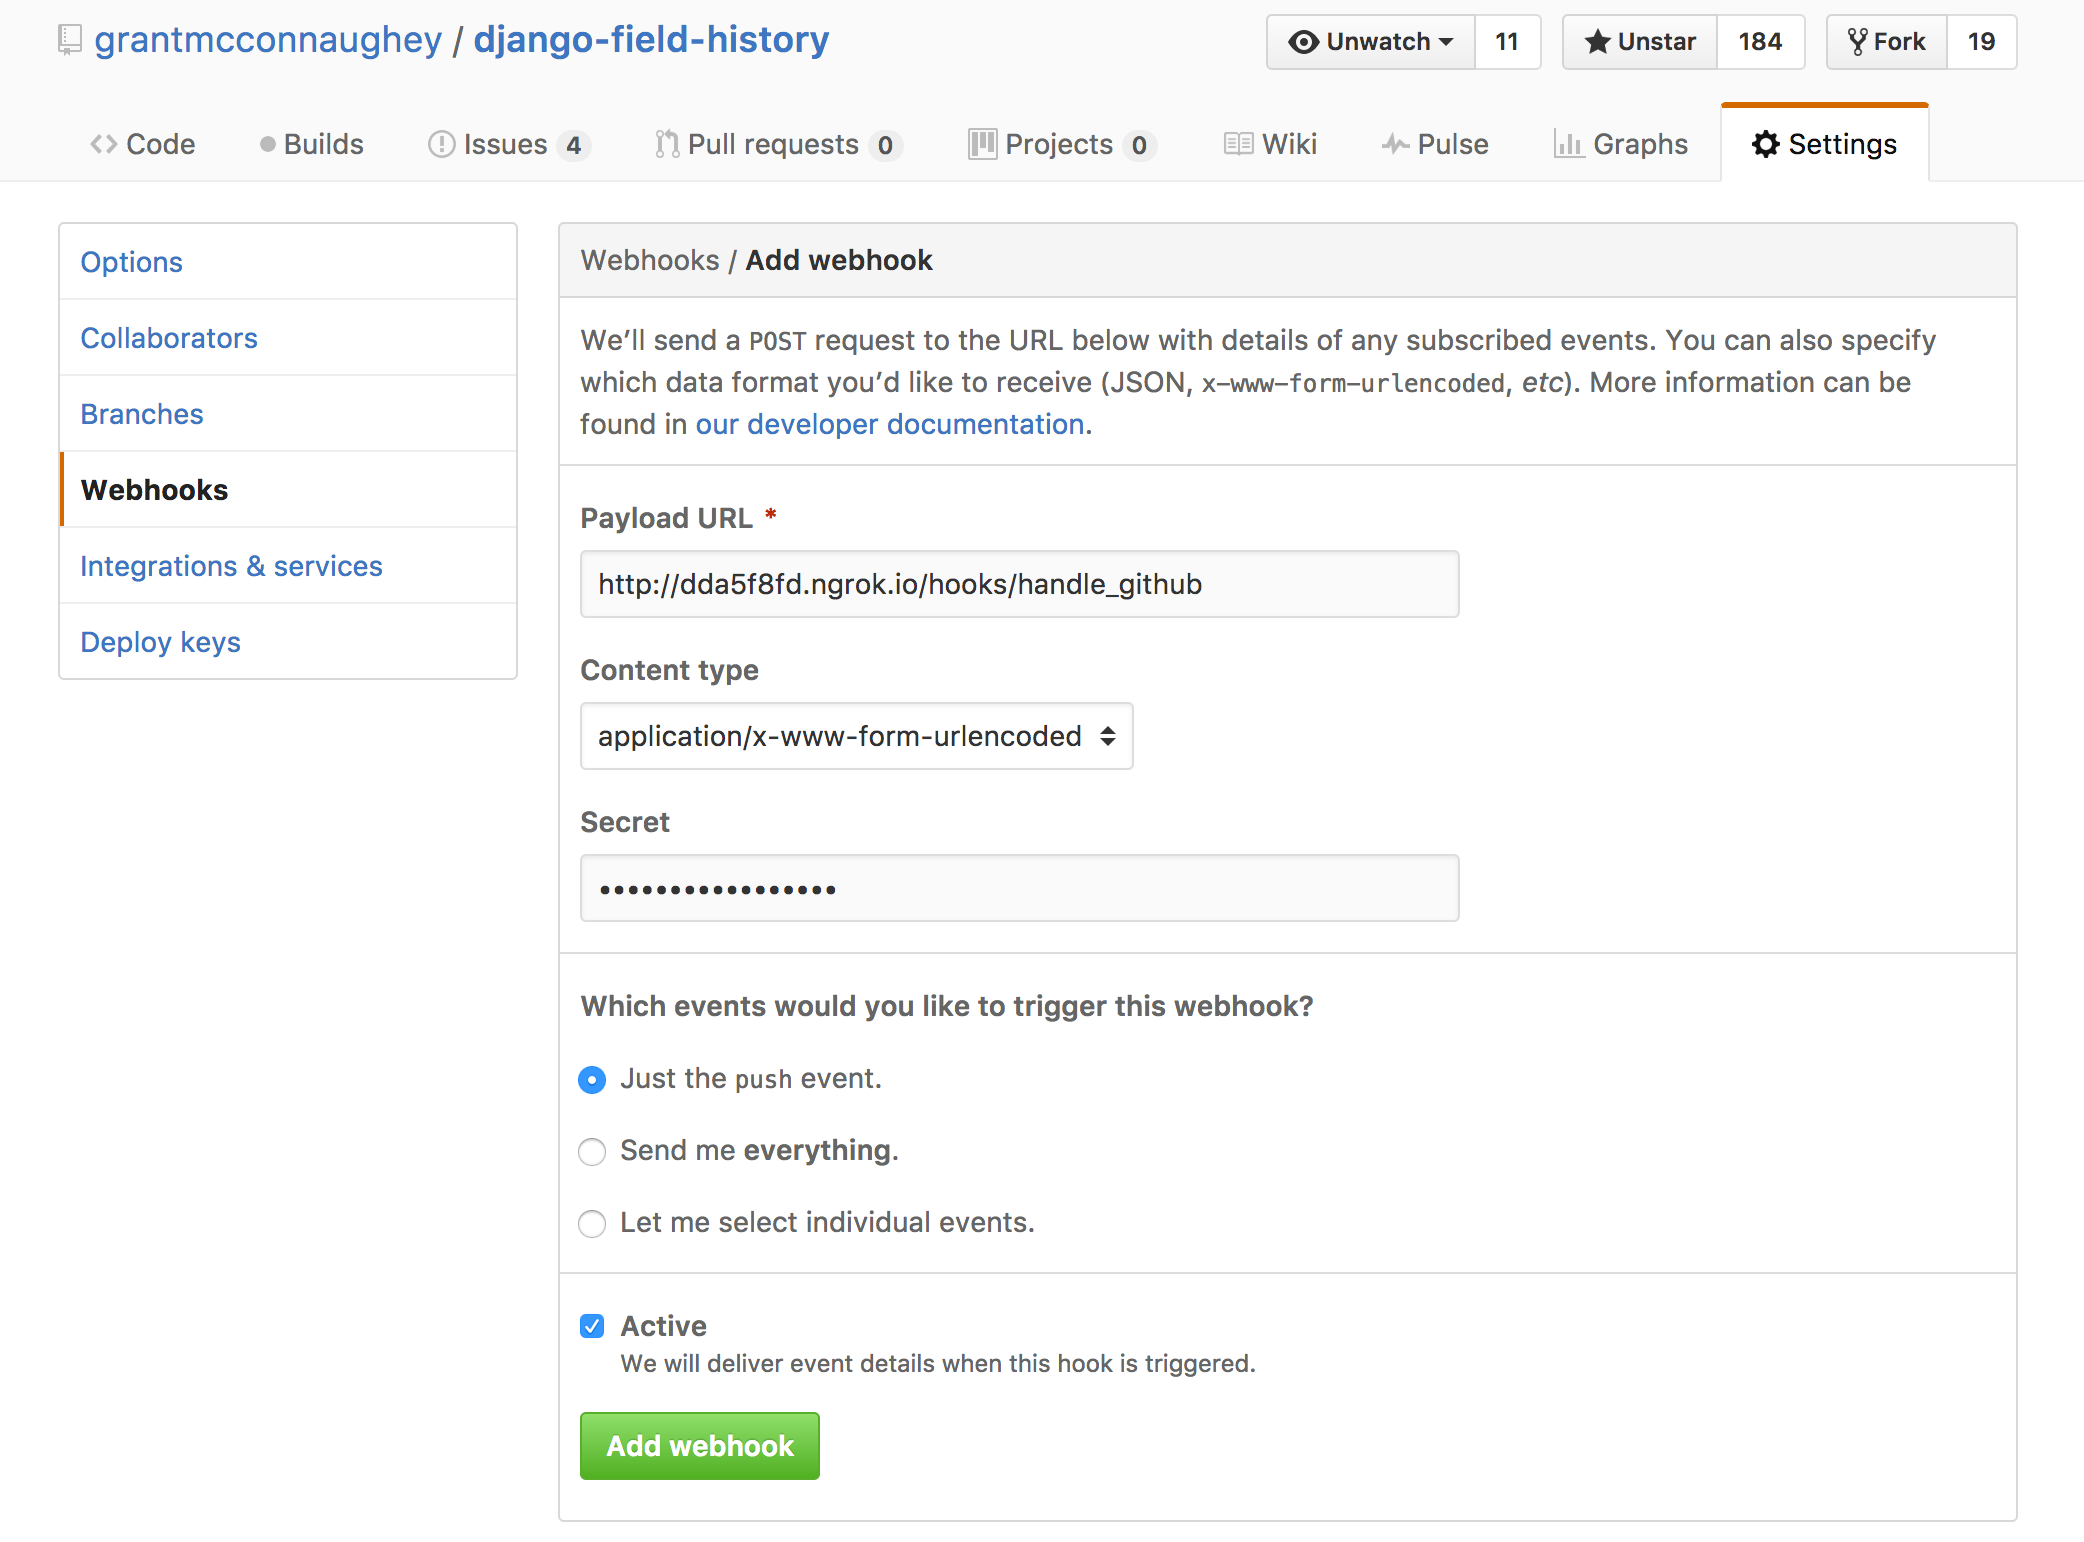 Setting up our webhook in GitHub
Click the Add webhook button and your webhook is ready for action.
Testing it out #
It’s finally time to confirm this whole thing is working. To do that, start up the development Django server by running python manage.py runserver. This should start your server on port 8000, which is the port ngrok expects.
Next we’ll need to trigger an event in GitHub. If you’re webhook is configured to handle the default push event then pushing a branch to GitHub will suffice.
Clone the repository where you created your webhook. For example:
$ git clone https://github.com/grantmcconnaughey/django-field-history.git
Now, create a new branch and push it back to GitHub.
$ git checkout -b webhook_test
$ touch new_file.py
$ git add new_file.py
$ git commit -m "Testing webhooks"
$ git push origin webhook_test
This will trigger the push event and GitHub will make a request to the ngrok URL you entered in your repo’s settings. This means you should see some activity over in the terminal where ngrok is running:
HTTP Requests
-------------

POST /hooks/handle_github/            202 Accepted
Huzzah! 🎉 We’ve successfully handled a GitHub webhook.
Conclusion #
In this post I discussed what webhooks are and why they’re useful. Next I showed you how to handle webhooks in a Django app using a view function. Then I made a derivative joke involving a beloved American game show. After that I showed you how to configure your local development machine to handle webhooks over the Internet. Finally, we proved that all of this actually works.